Inserting tables into a Gmail message can seem tricky, but it’s entirely possible with a few clever workarounds. Whether you want to organize data neatly or present information clearly, tables are an excellent tool. Here, we’ll explore various methods to insert tables into Gmail messages, ensuring your emails are both informative and visually appealing.
Why Use Tables in Gmail?
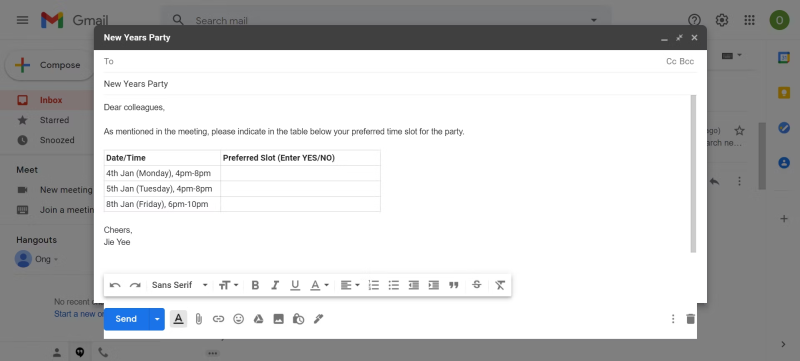
Tables offer a clean and structured way to present data. Instead of sending a separate file, you can integrate the table directly into your email, making it easier for recipients to view and understand the information.
Methods to Insert Tables in Gmail
There are several methods to insert tables into Gmail. We will cover two primary approaches: copying from Google Sheets or Microsoft Excel and using a Google Chrome extension.
Using Google Sheets or Microsoft Excel
Creating a table in Google Sheets or Excel and then copying it into your Gmail message is one of the most straightforward methods. Here’s how you can do it:
Step-by-Step Guide
- Create the Table: Open Google Sheets or Microsoft Excel and create your table. Enter the data and format it as needed.
- Copy the Table: Select the entire table, right-click, and choose “Copy” or press Ctrl+C.
- Paste into Gmail: Open Gmail, start a new email, and place your cursor where you want the table. Right-click and choose “Paste” or press Ctrl+V.
Using Google Chrome Extensions
Another efficient method is to use a Chrome extension designed for adding tables to Gmail. One such extension is Gmail Tables by cloudHQ.
Step-by-Step Guide
- Install the Extension: Add Gmail Tables by cloudHQ to your Chrome browser.
- Compose a New Email: Open Gmail and start a new email. Place your cursor where you want to insert the table.
- Insert the Table: Click on the extension icon, configure your table settings (number of rows and columns, colors, etc.), and insert it into the email.
- Edit the Table: After inserting, you can add or remove rows and columns and input your data.
Inserting Tables on Mobile Devices
Adding tables to Gmail using a mobile device involves a slightly different process but follows similar principles. Here’s how you can do it:
Step-by-Step Guide
- Download Google Sheets: Install the Google Sheets app from your device’s app store.
- Create the Table: Open Google Sheets and create your table with the necessary data.
- Copy the Table: Select the table, copy it, and then switch to the Gmail app.
- Paste into Gmail: Start a new email, long-press where you want to insert the table, and select “Paste.”
Common Issues and Solutions
| Issue | Solution |
|---|---|
| Table formatting is lost | Ensure you are copying from Google Sheets or Excel directly into Gmail without any intermediate steps. |
| Table appears jumbled | Disable Plain Text Mode in Gmail to maintain the table’s layout. |
| Unable to edit the table in Gmail | Make necessary edits in Google Sheets or Excel before copying and pasting into Gmail. |
Enhance Your Gmail Experience
Inserting tables into your Gmail messages can greatly enhance the clarity and professionalism of your emails. By following the methods outlined above, you can seamlessly integrate tables into your Gmail communications, whether on a computer or mobile device. Embrace these techniques and make your data presentation more effective with tables in Gmail.